
 We shoot Motorz with a limited crew, and sometimes I’m even flying solo. Filming a 22-minute (half hour format) television series on a budget has its challenges, but they are so much fun to work around it’s part of the game. Take for example my recent challenge. I wanted to be able to ceiling-mount one of our three Canon 60D DSLRs so I could position a camera anywhere overhead (within reason).
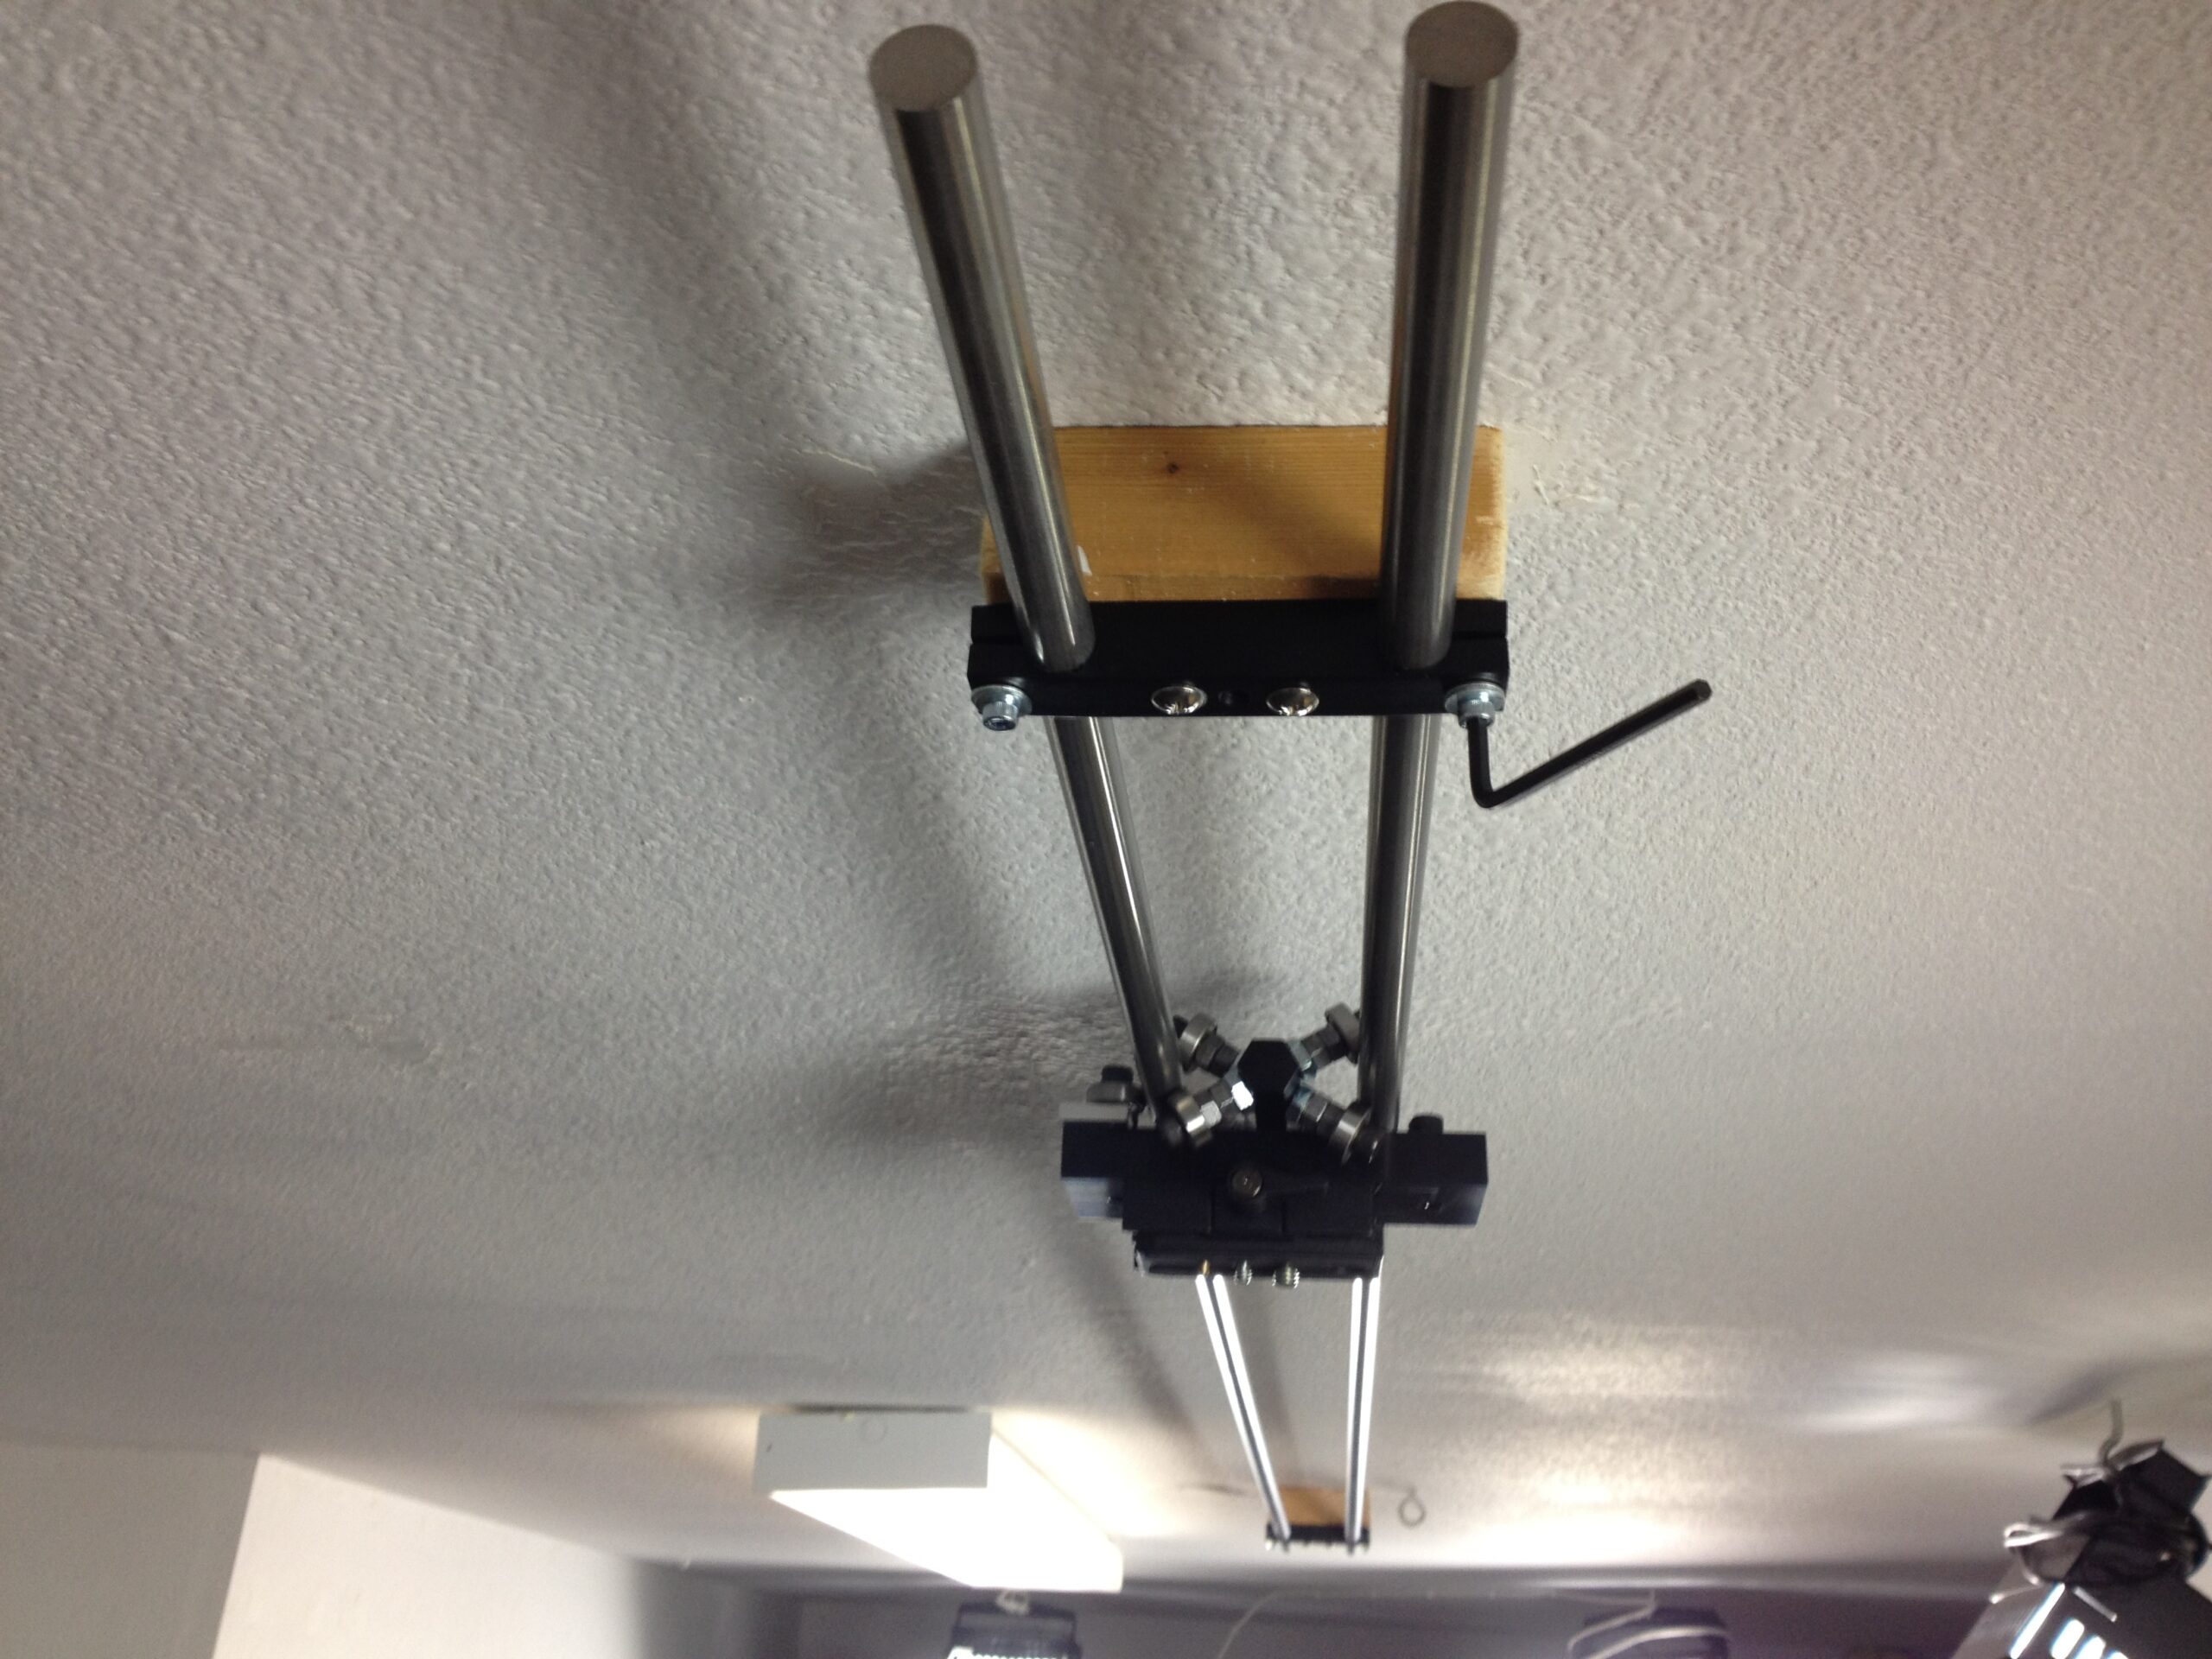
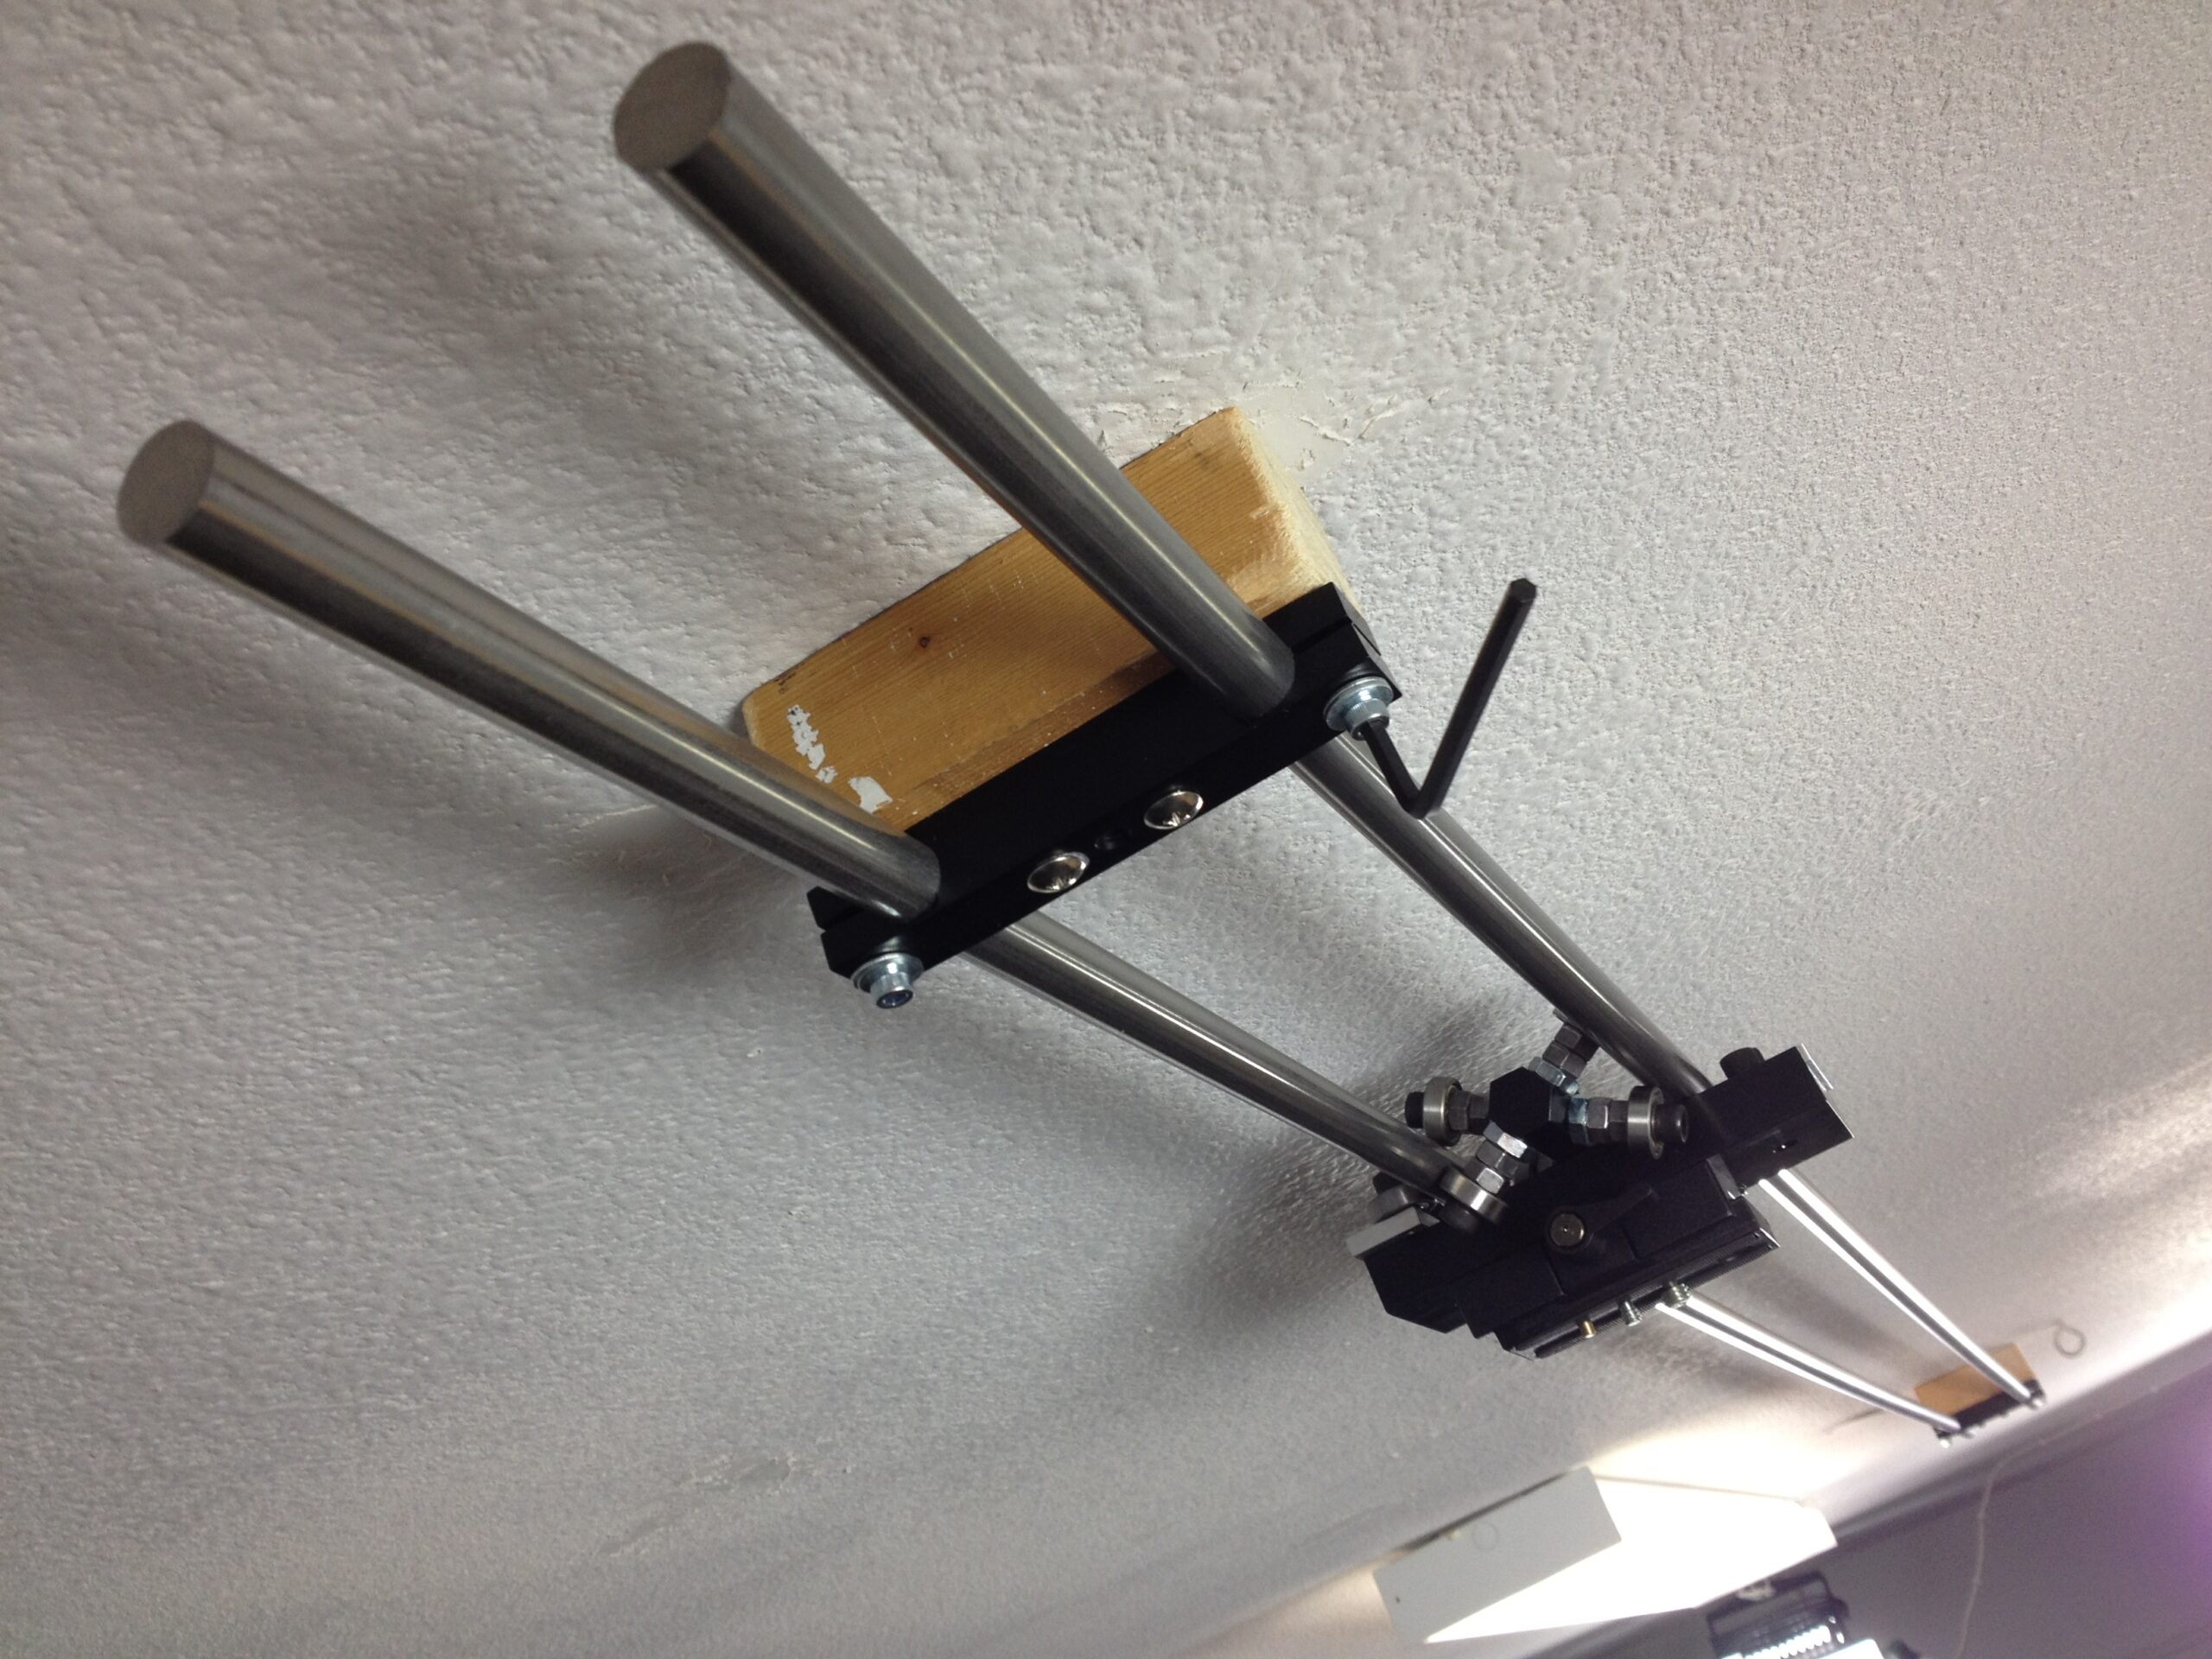
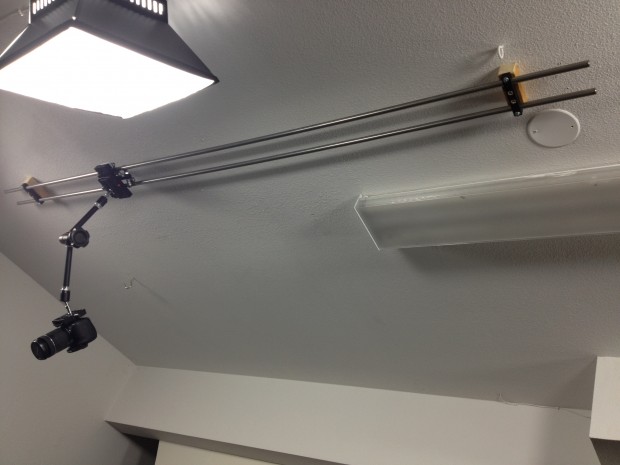
I knew that I wanted to span about an 8-foot range between the two sides of my two car garage-turned studio. I didn’t need a slider for movement shots (I have a Kessler PocketDolly that I love for doing that), rather I needed a slider so that I could quickly position the camera left and right. Then, using some other method–be able to position the camera wherever I wanted. Quite the challenge.
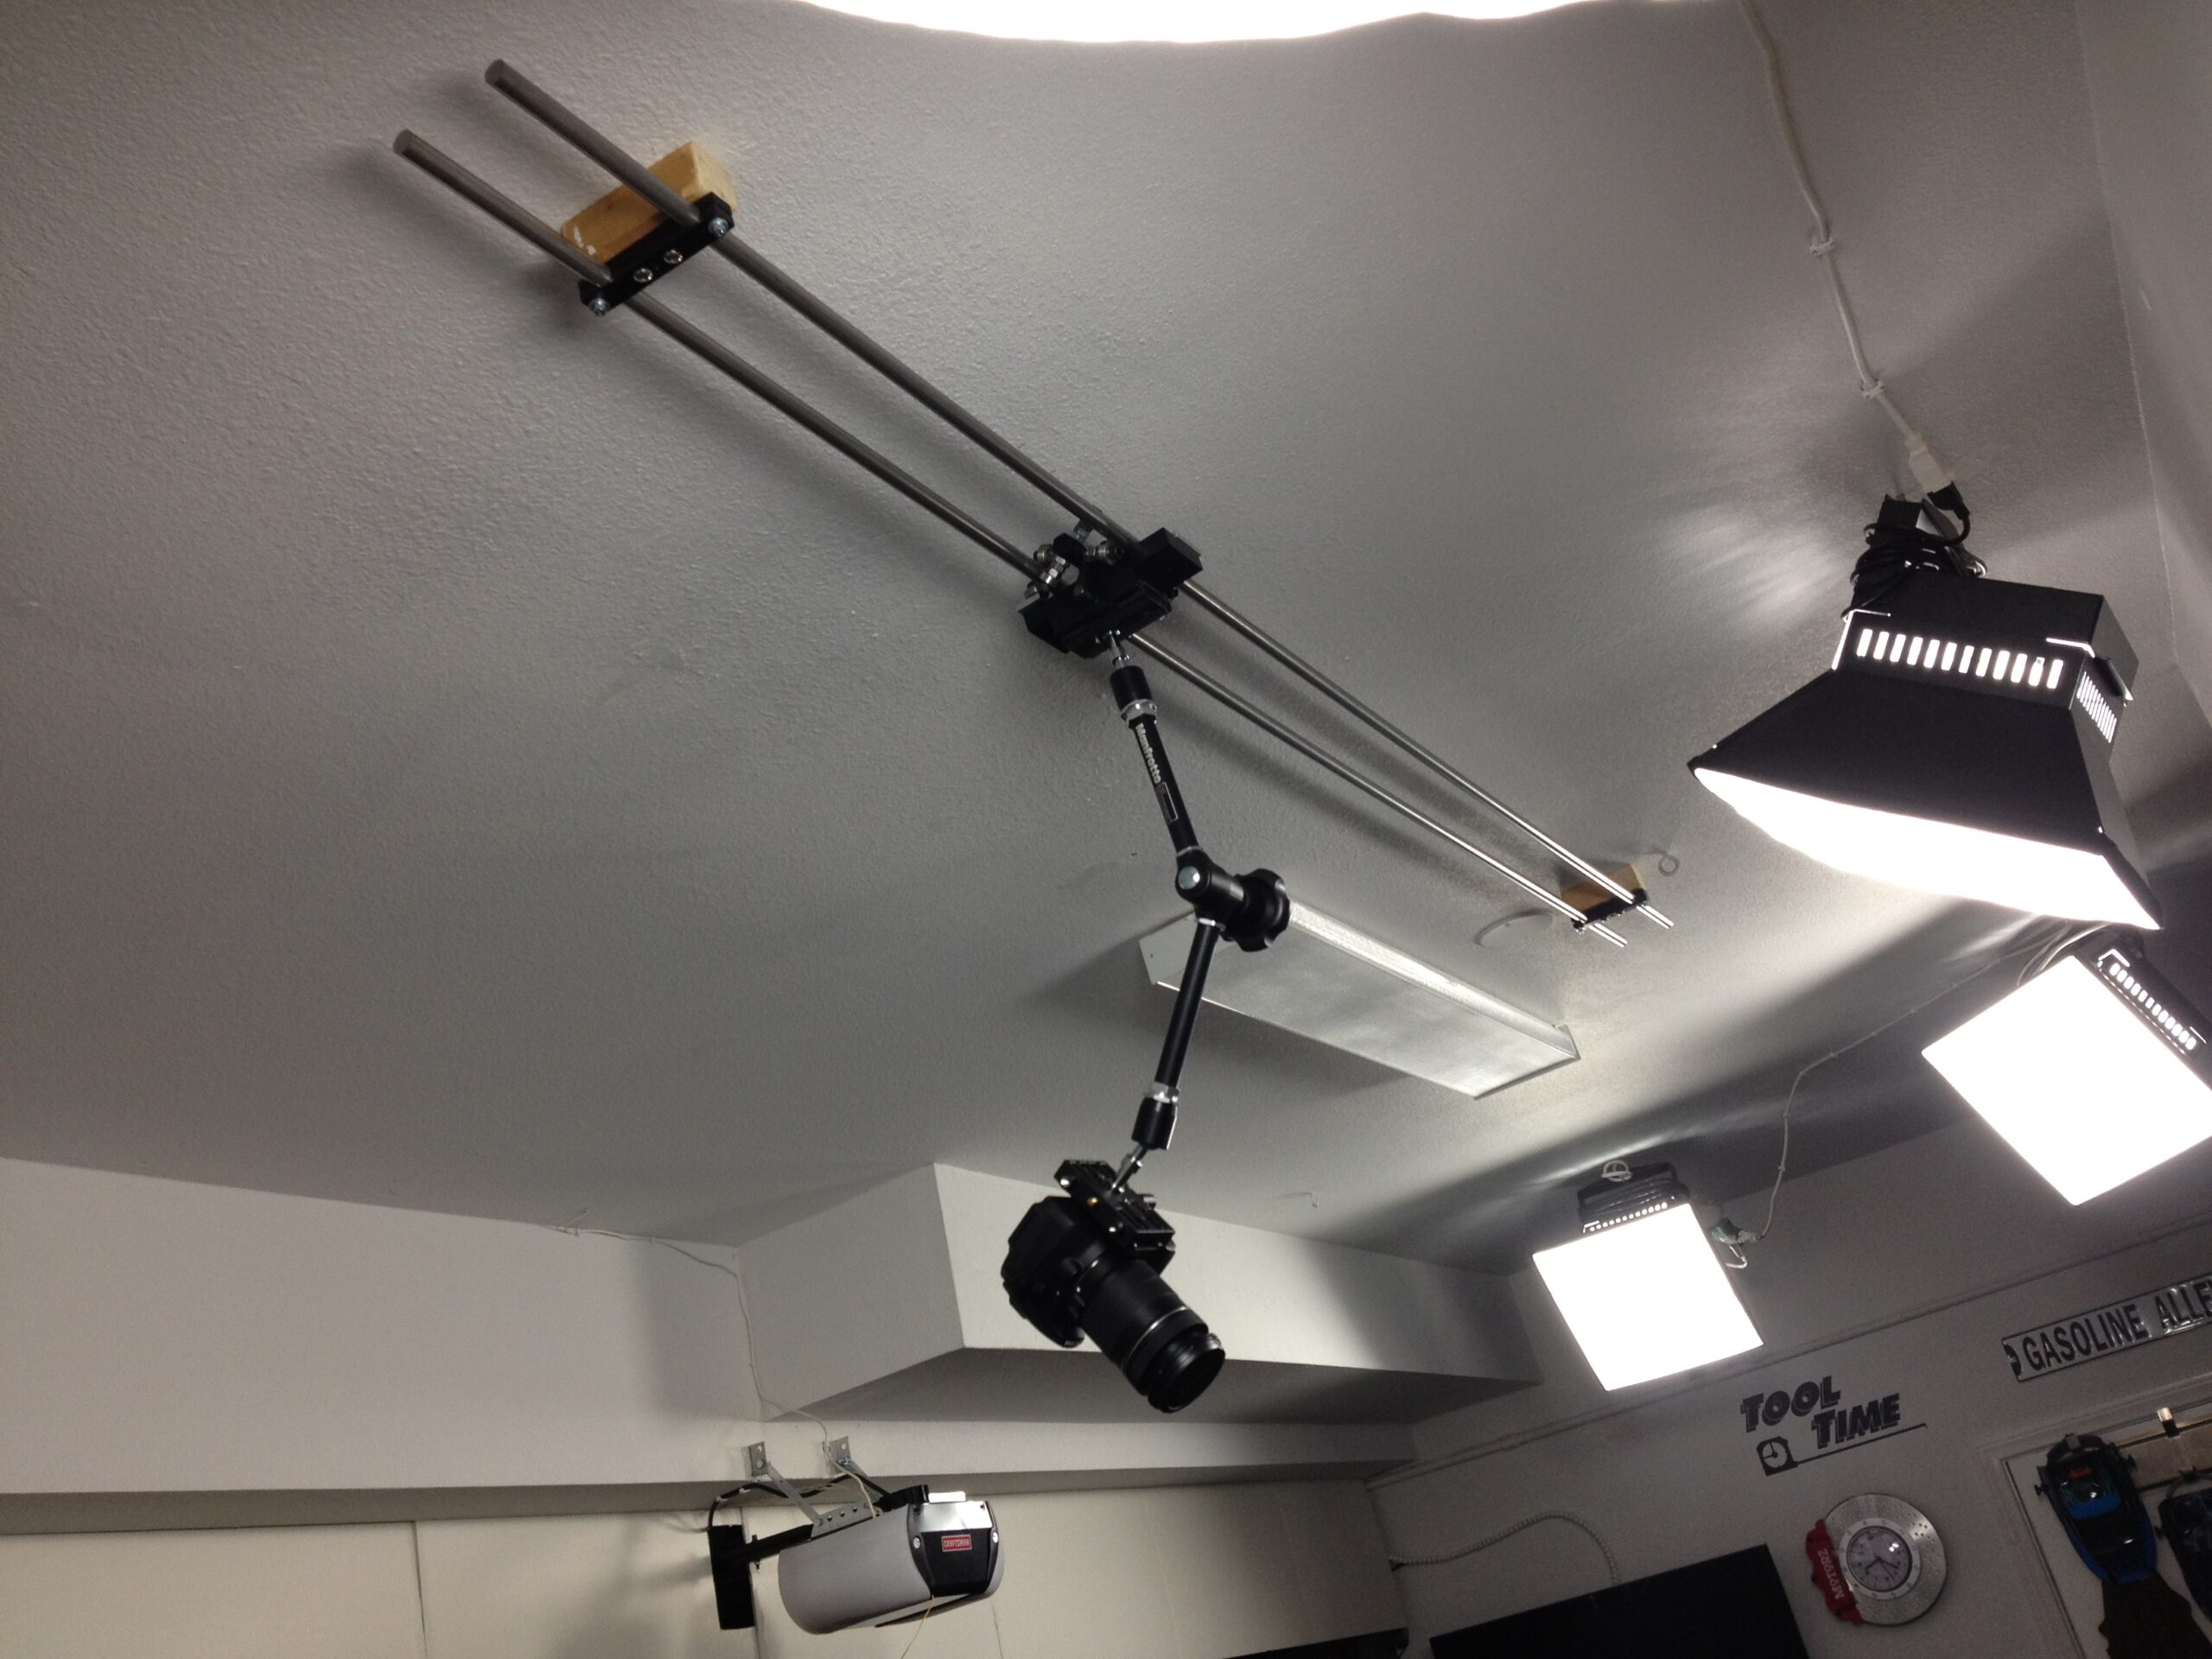
I took this challenge to my Facebook page because there are a few gear junkies that I knew could help me out. Josh Johnson who “works in Television and Internet Delivered Media for PBS and Arkansas Dept. of Education” (his words) is always keen to offer suggestions. He suggested the Manfrotto 244N Magic Arm ($90 street) to help me achieve unique camera positioning using my PocketDolly.
For my ceiling-mounted solution, he suggested the ‘budget’ DIY 8-foot slider solution from JuicedLink. Their kit, which includes everything but the steel bars, runs about $200. I had to purchase from another source two 8′ steel rods:
2 pieces @ $30.20/piece
Stainless T-303 Annealed
Cold Finish Round
0.625″
Cut to: 96″
Cost: $87.49
Shipping Cost: $24.39
Nov 2020 Update: I get an email about once a month about this article and the fact that the JuicedLink solution isn’t available. Unfortunately, I can’t find a replacement. However, reader Alan Davis had a great suggestion to use this Glide Gear OH 150 Modular Overhead Camera/Light Rig and mount it on the ceiling somehow. It’s quite a bit more expensive than the solution I originally proposed. If you find something else, please comment down below.
I thought about doing a true DIY job with some hardware store-purchased materials, but I just don’t have the time these days for extra projects.
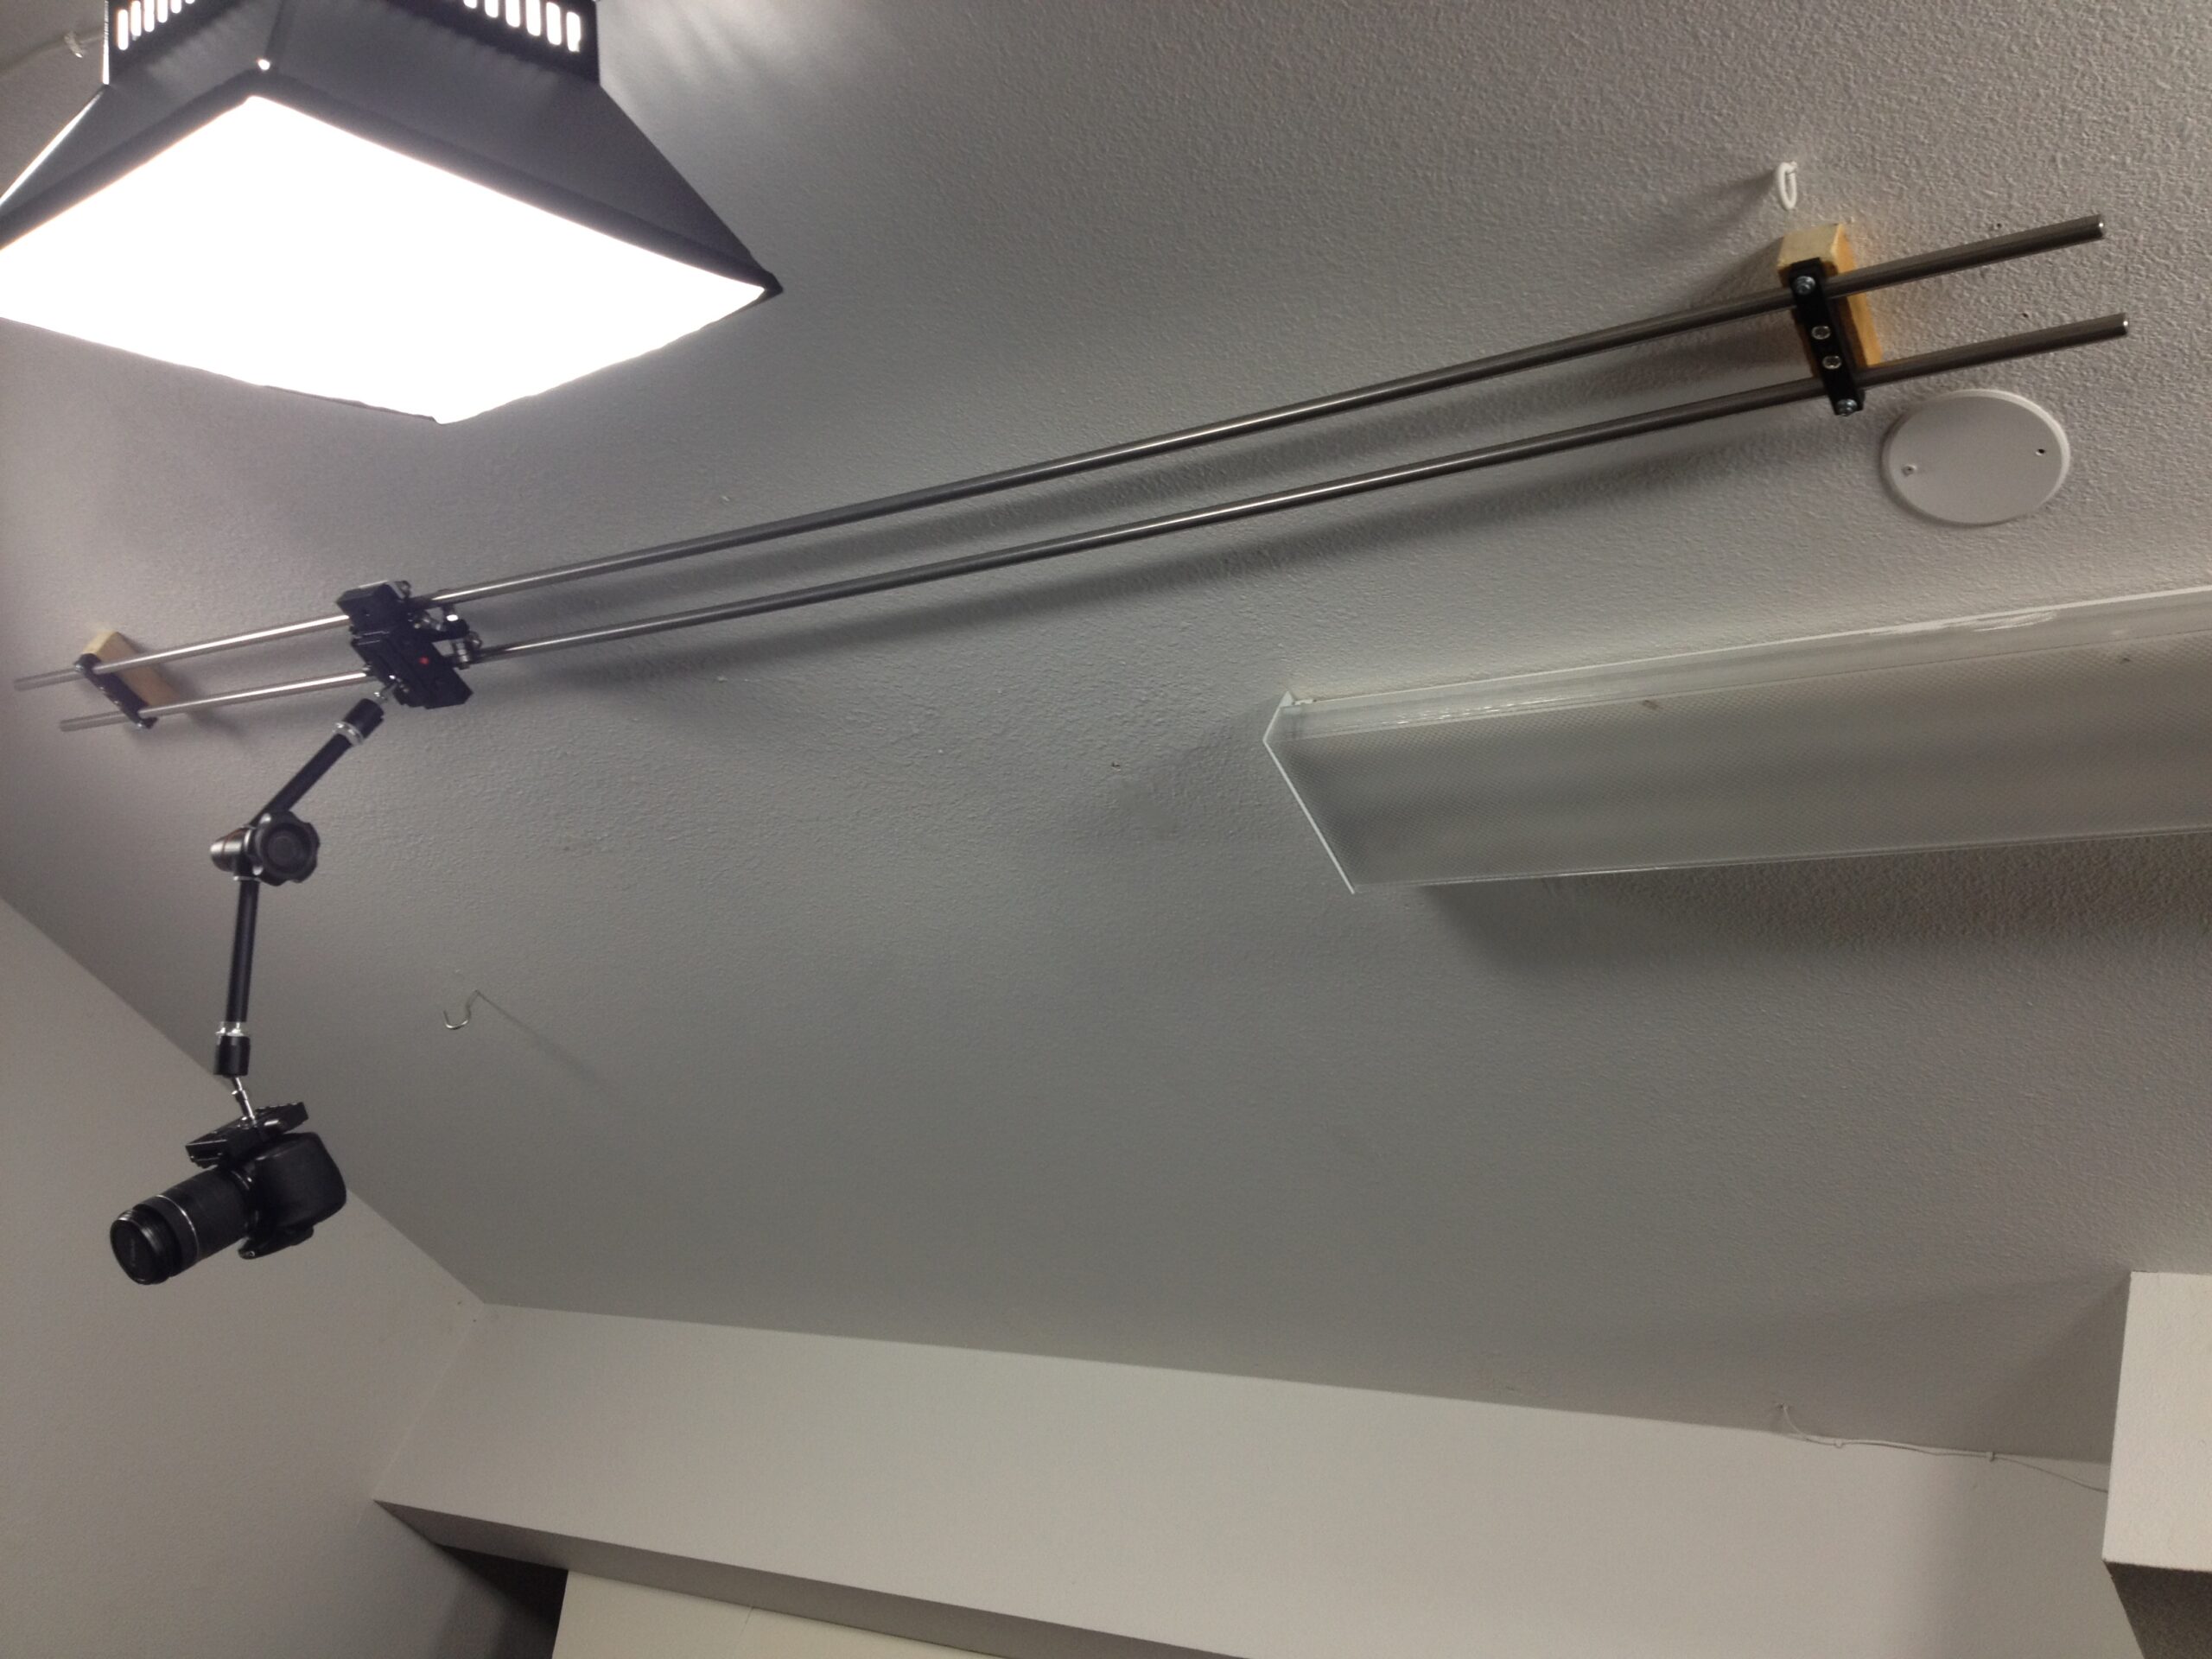
Within about a week I had all the parts and after I found some studs in the ceiling, up it went. There’s a slight bit of overhang because of where the studs were positioned, but that’s fine–I still get a 7′ range of motion. After I put the Magic Arm up there and mounted my DSLR, the downward pull from the arm and the DSLR wasn’t a challenge–unless I angled the arm away from the rails–then it started to bow and twist a bit. Not so much that it looked unsafe, but definitely isn’t something that I would leave there for very long.
Here’s a short shaky iPhone video that I made with it in action, showing how easy it is to move it around. BTW, the ceiling is 9′ high, so in order to safely mount the camera and position the Magic Arm I have to use a step ladder. But once it’s up there, I can just reach up and move it side-to-side without the use of a ladder. Thanks for your suggestions, Josh! It turned out great!
Discover more from Chris Duke
Subscribe to get the latest posts sent to your email.
Leave a Reply