
 This is your complete how-to guide for using a remote control with the HOVERAir X1 selfie drone. It will be updated over time with the latest information. Let’s fly right into how to make your X1 flying camera work like a normal drone.
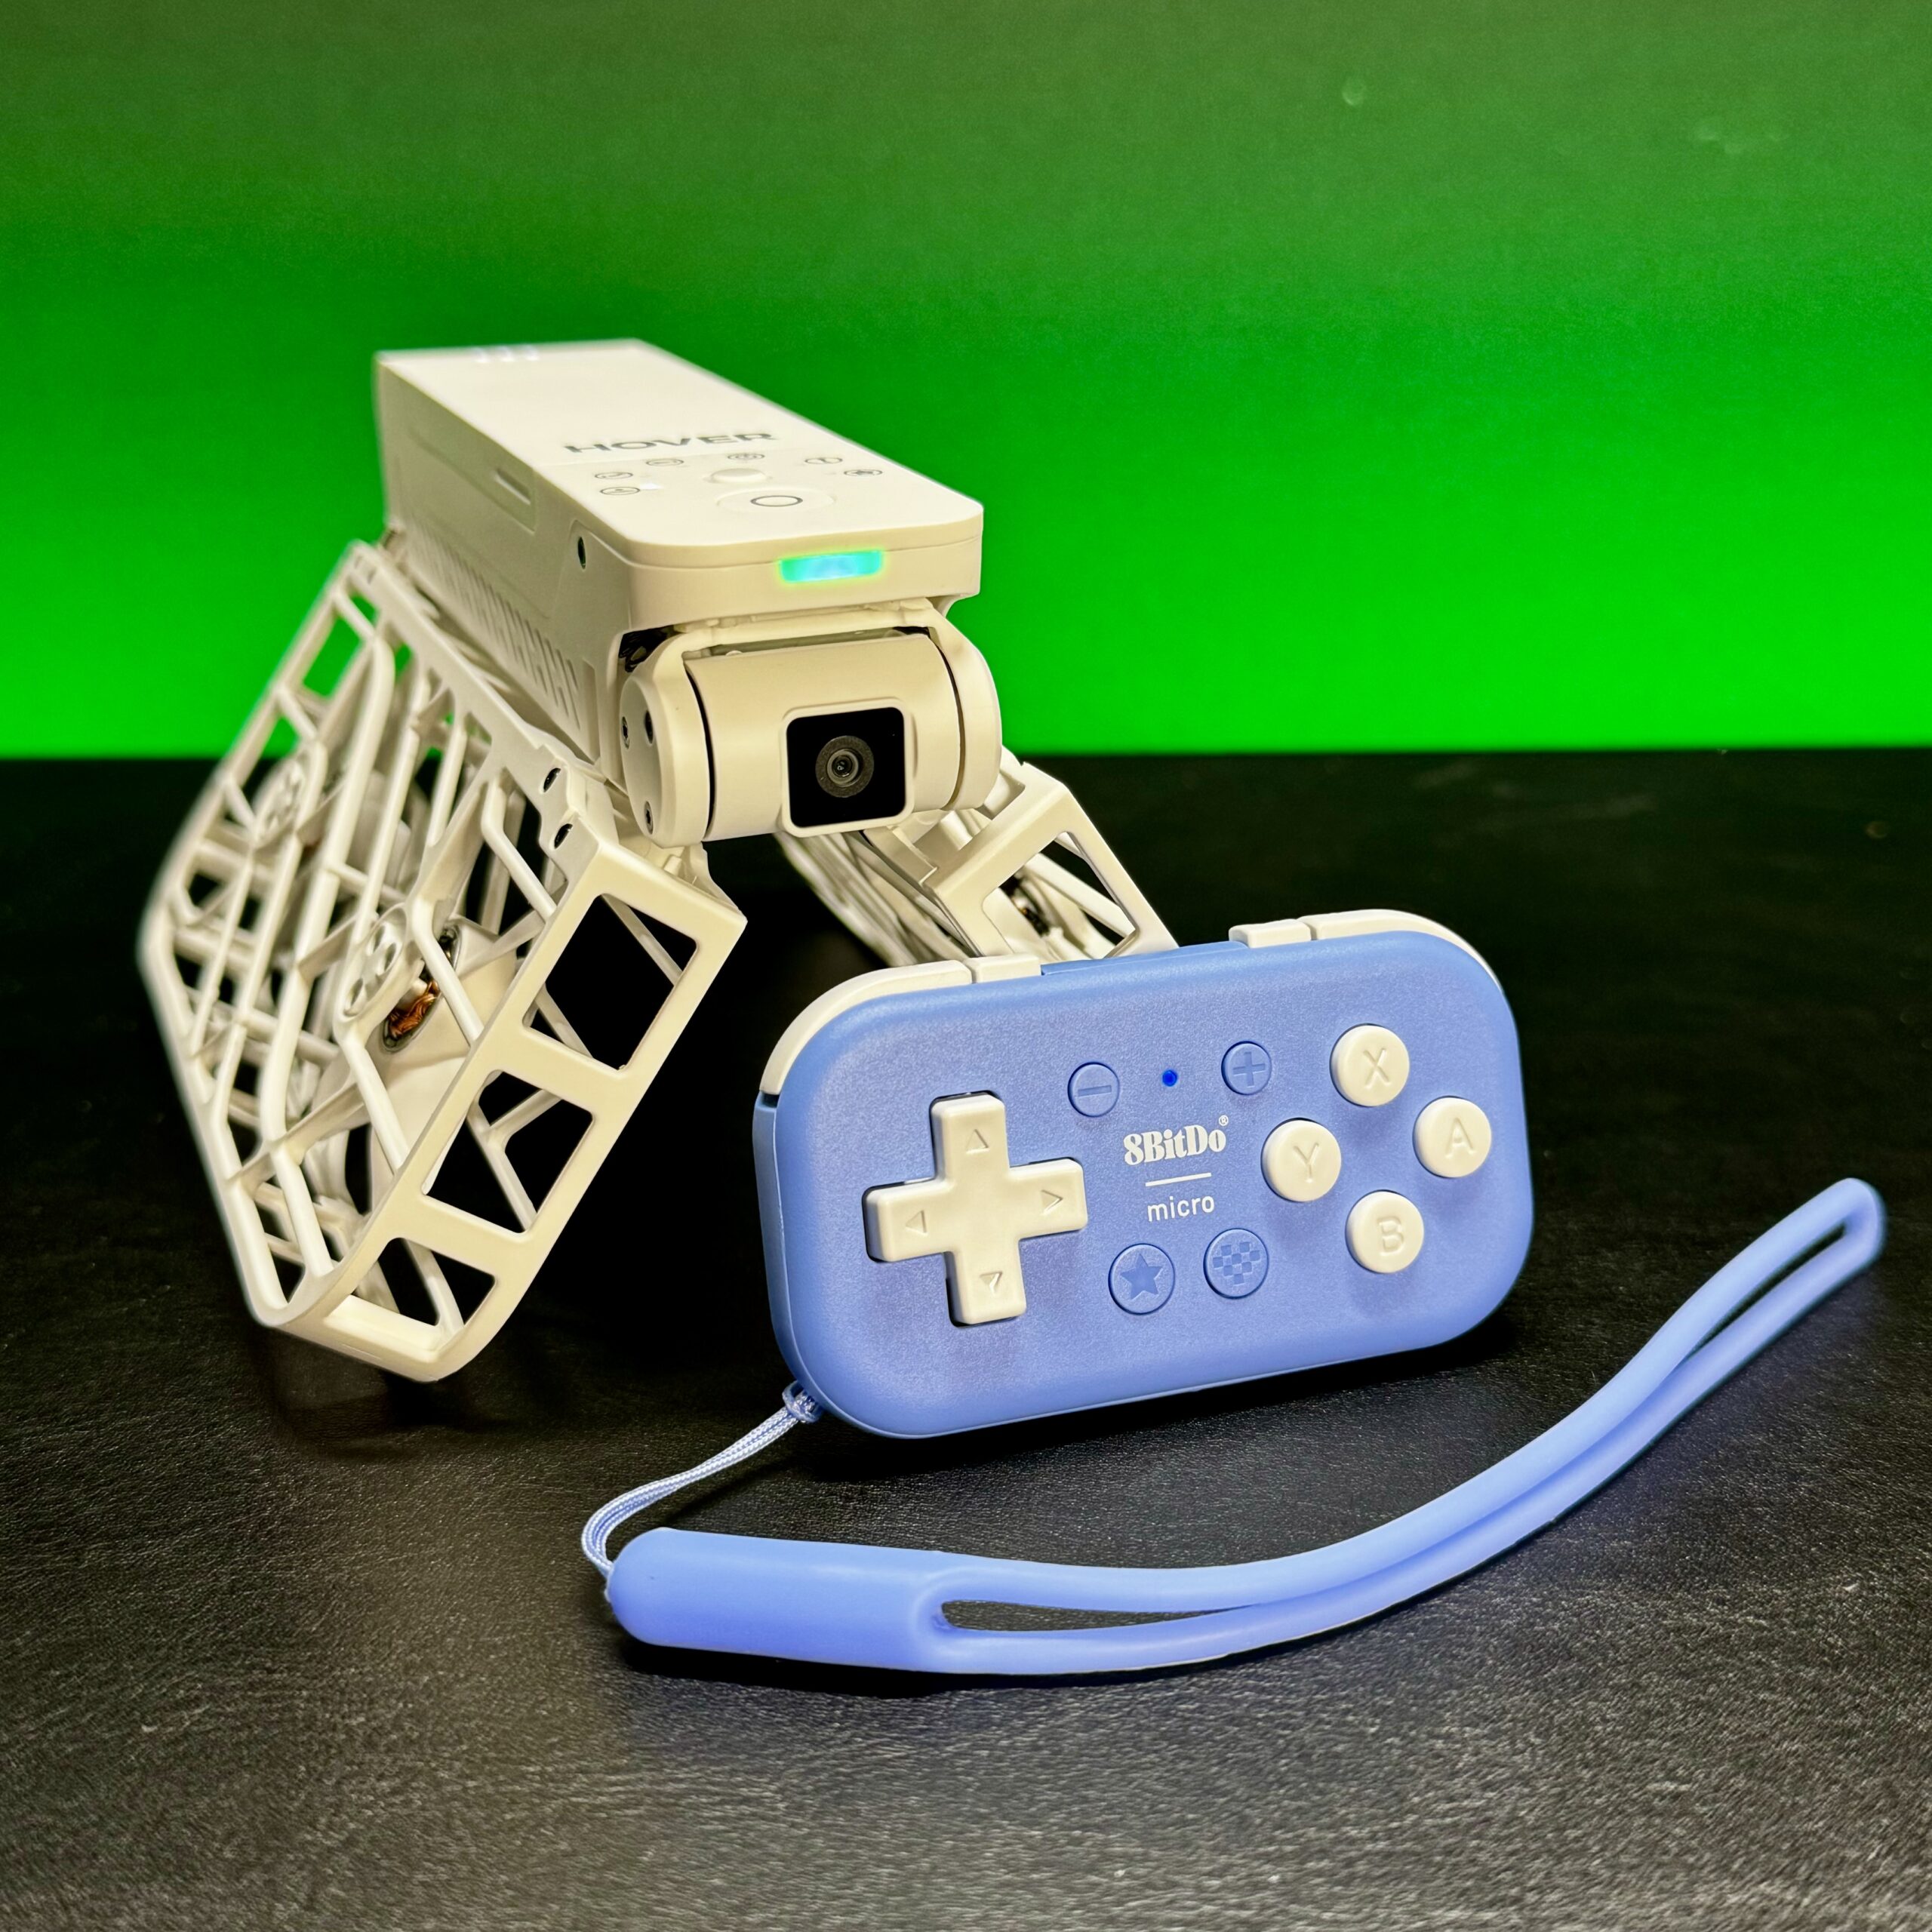
While the X1 is billed as an autonomous flying selfie camera, there’s also a mode which allows you to fly the X1 manually using the app itself. It works great, however controlling any drone via a touch screen is not ideal. Something physical is required for best results.
While I’ve only tested two remotes from 8BitDo, I would imagine that any remote control that allows mapping of the buttons to keyboard key presses should work just fine. For best results, I recommend the 8BitDo Micro which is about $25 on Amazon. I also tried the 8Bitdo Zero 2 with poor results. I highly recommend picking up the Micro which allows for the best flexibility and customization.
In addition to the 8BitDo Micro, you will also need to get the free app which is available for iOS and Android. Ignore the horrible reviews as I encountered no issues with the iOS app. There are two other controllers which are supported by the app (8BitDo Micro and 8BitDo Pro 2), however they do not support keyboard mode so they will not work (I tried the Pro 2). The only 8BitDo controller which works is the Micro.
The HOVERAir X1 responds to bluetooth keyboard presses. So, for example, pressing the letter F makes the drone fly forward, while the letter E makes it fly backwards. It’s pretty simple, and since it is so simple all you need is a programmable controller that allows mapping the buttons to one or more key presses. Here’s the full list:
C = Fly left
D = Fly right
F = Fly forward
E = Fly backwards
I = Ascend/up
G = Descend/down
H = Rotate/yaw left
J = Rotate/yaw right
M = Gimbal down
K = Gimbal up
N = Start recording
Set It Up
- Get the HOVERAir X1 selfie drone
- Get the 8BitDo Micro gamepad
- Get the 8BitDo Ultimate Software (app) for iOS or Android
- Move the switch at the bottom of the Micro to the far right for (K)eyboard mode
- Press and hold the pair button that is next to it for a few seconds until the LED starts to blink rapidly, letting you know it’s ready to pair
- Use your phone’s bluetooth settings to pair it (Settings > Bluetooth)
- Open the 8BitDo app
- Map the buttons to my suggestions, below
- Press the “Sync to device” button (bottom right) to save the configuration to your Micro
Tap or click the image to embiggen
Now you can start your HOVERAir X1 and the Hover X1 app, enter manual mode, take off and then use your controller!
Note that the maximum transmission range from your phone is 30 meters (98 feet) with a maximum altitude of 15m (49 feet), so make sure you keep your drone within that range.
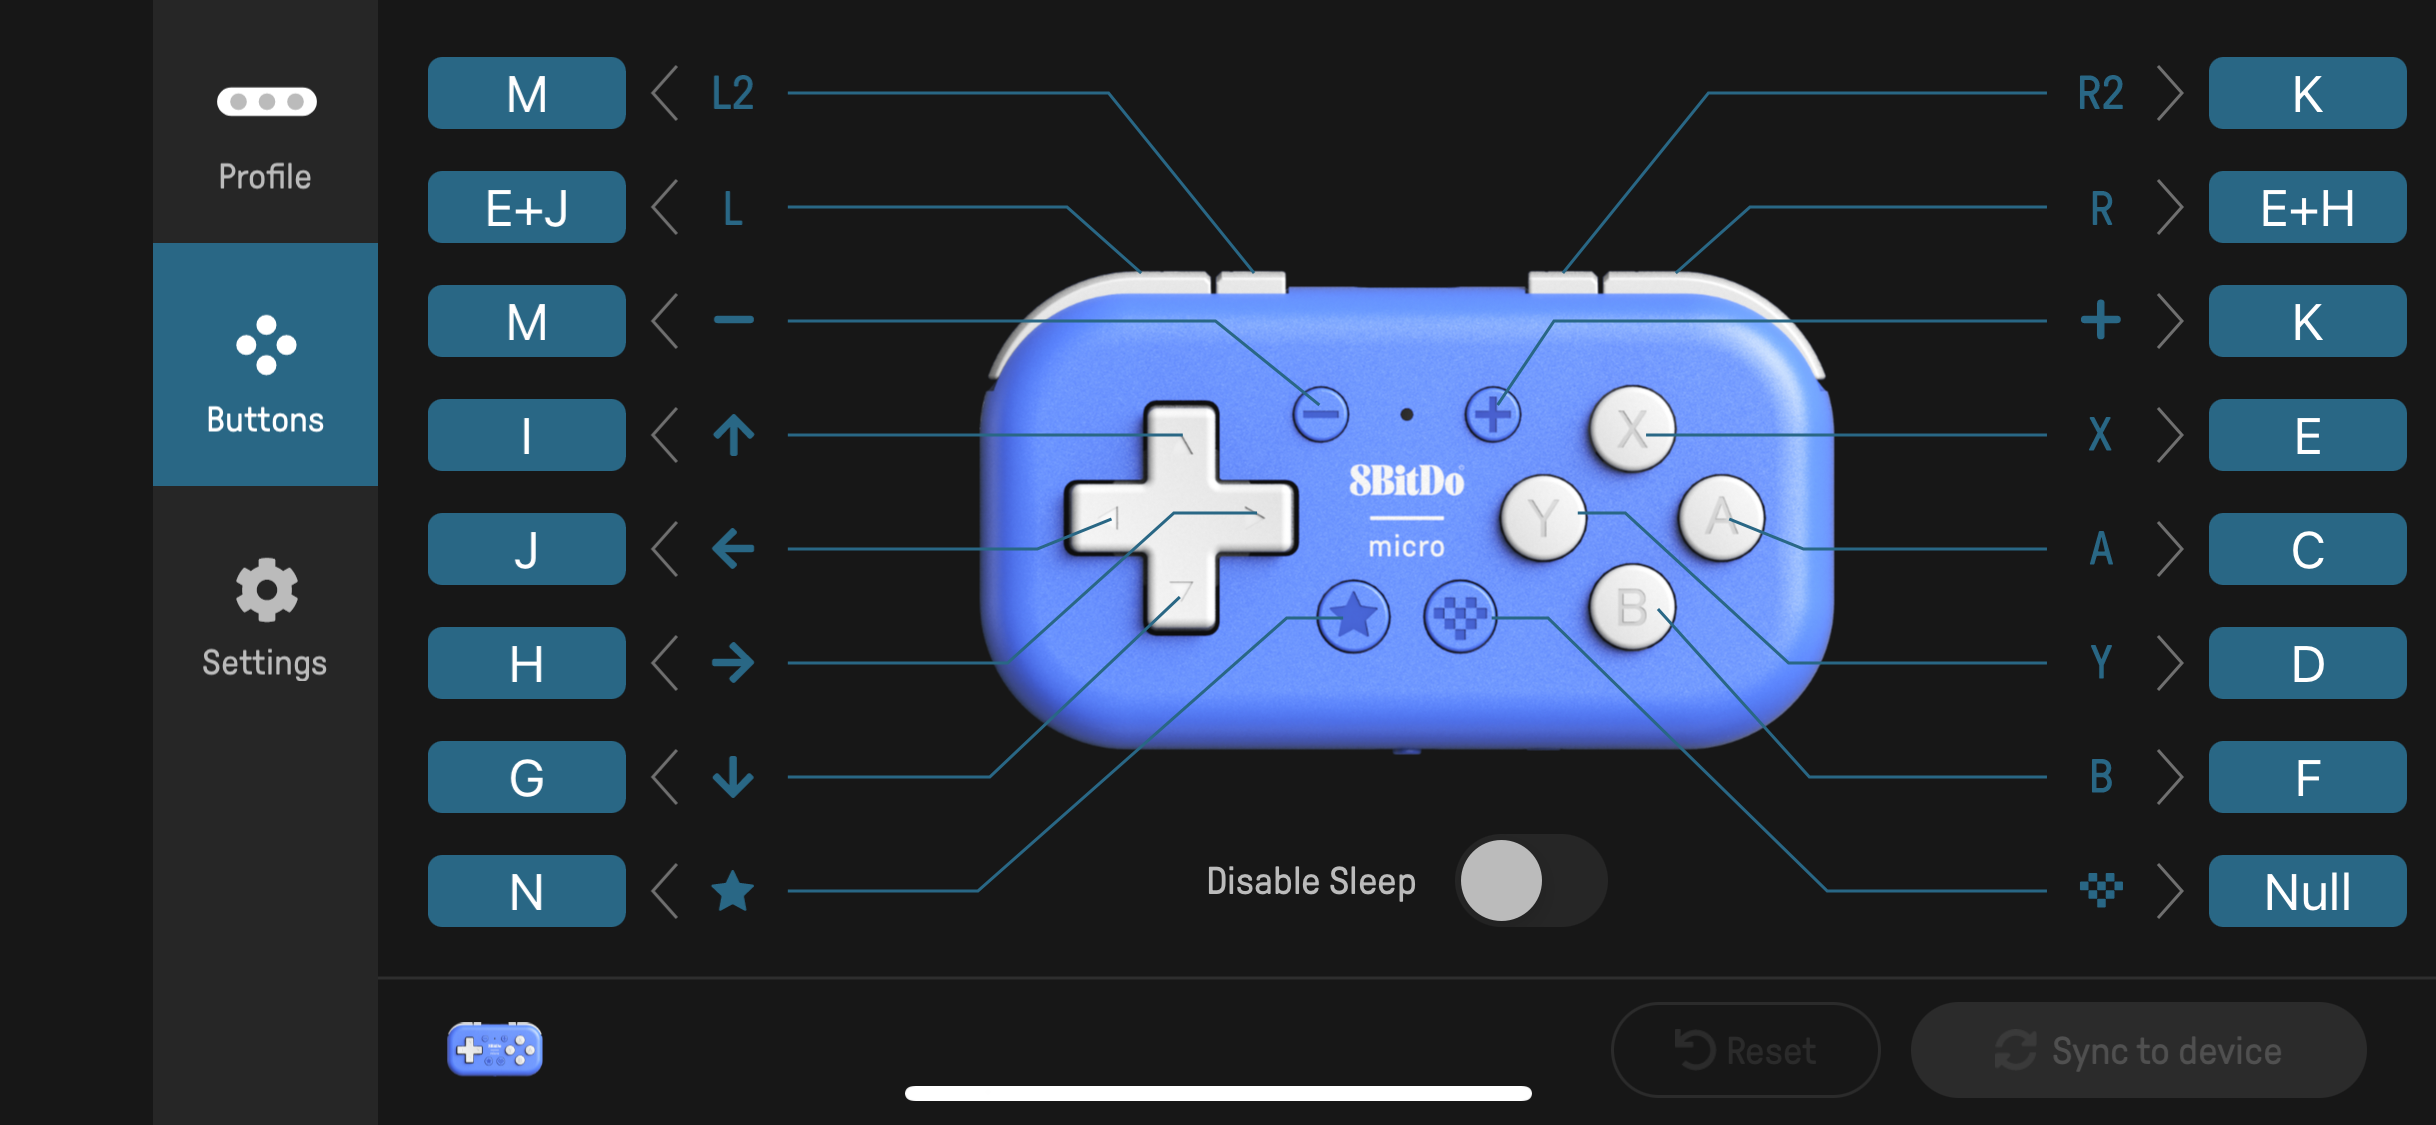
8BitDo Micro Key Settings
The key settings I have shown in the above screenshot from the 8BitDo app are fairly standard for mode 2 drones, however I did add some custom configuration settings of my own.
I wanted to be able to steer the X1 forward and to the left or right with one button. Since the 8BitDo app allows you to assign a key combo, this made it possible. So, the (L) and (R) paddle buttons on top are programmed to do this. You can easily add multiple key combinations using the “Key combos” tab on the left. I would imagine that if you wanted it to make a sharper turn while going left you could add an additional J or H such as E+J+J or E+H+H.
Since all of these buttons are configurable, you could make them do whatever you like! For example, I duplicated the L2 and R2 (the two smaller top buttons) to move the gimbal down and up, respectively.
You could make the buttons fly the drone up or down and turn at the same time. Or get really fancy and have a button fly the drone back and up, make a 360 turn and then fly forward and down the same distance — just like the included zoom out mode. In theory, you could probably reproduce several of the default flight modes.

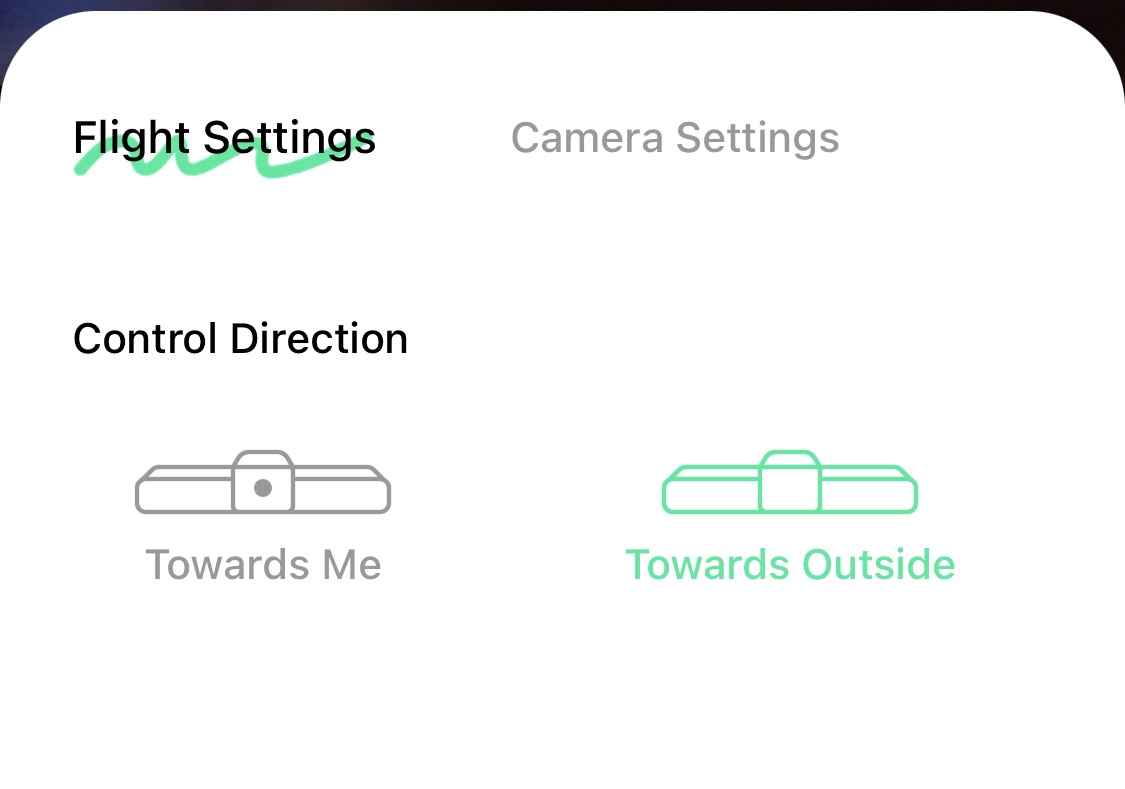
Change your Flight Settings
There’s one additional setting that I highly recommend you change, otherwise the controls may seem backwards for you. Within the Hover X1 app, go to the settings while in manual mode and change the Flight Settings control direction to “Towards Outside”:
Additional Links & Info
You can download a PDF version of the 8BitDo Micro manual.
Pick up some extra batteries for your Hover X1.
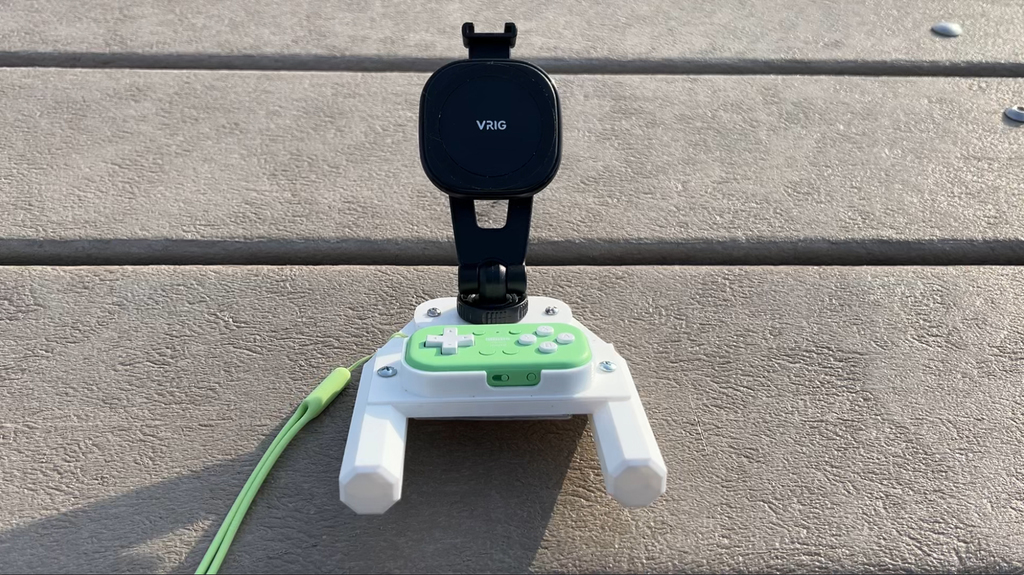
 Remote Control Holder
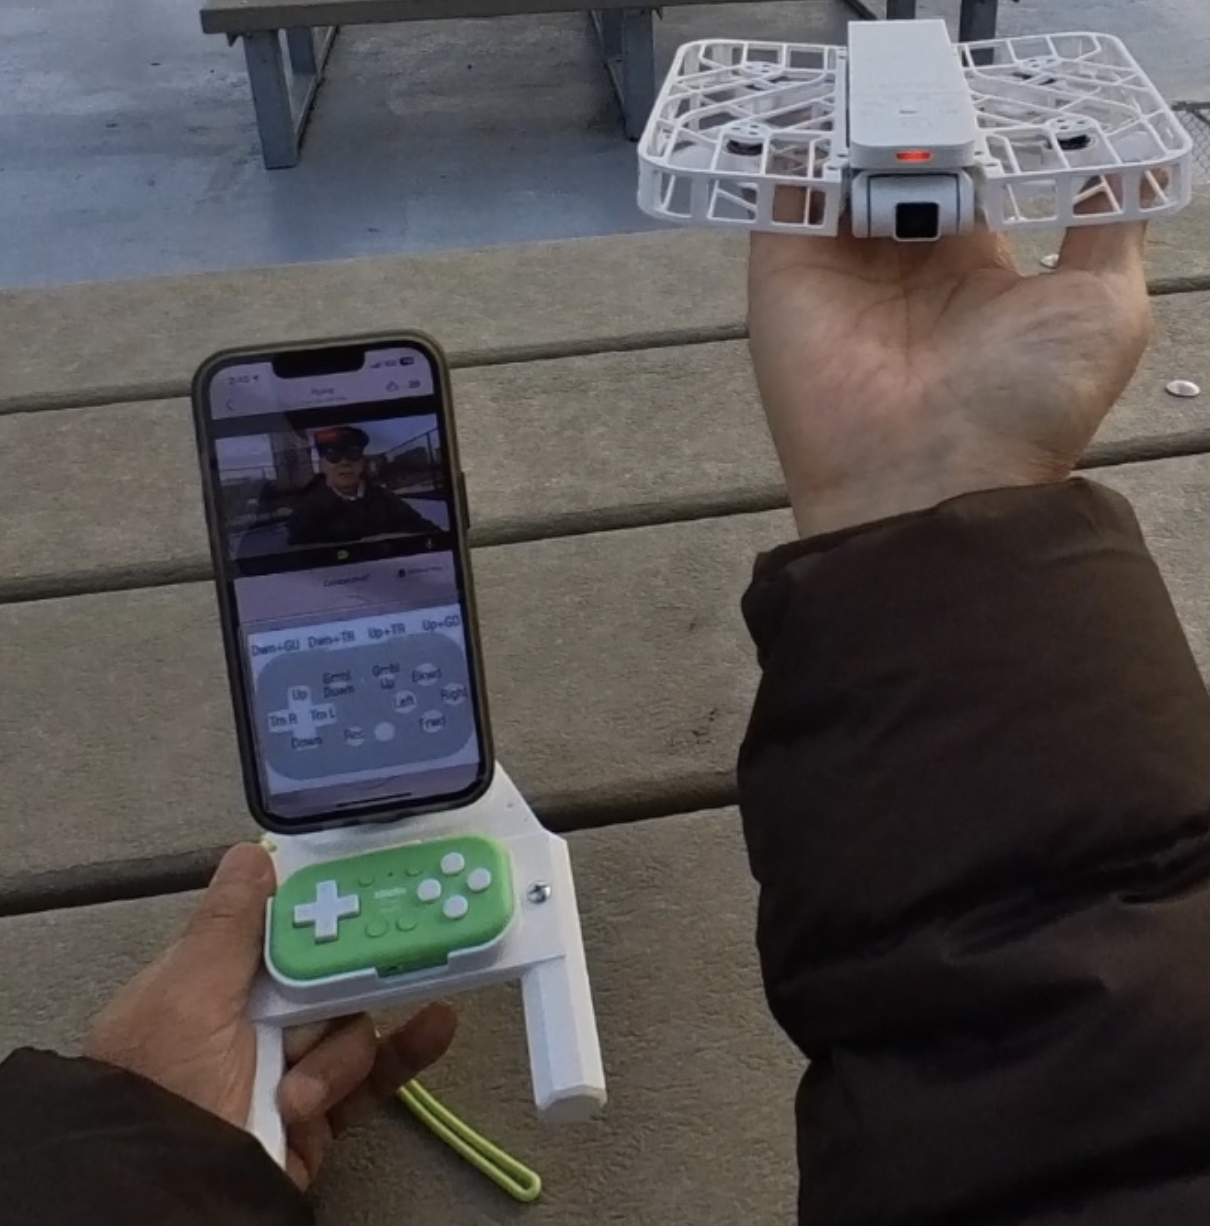
The problem with having this remote controller for the Hover X1 is that you have to juggle it alongside your phone. You need to keep your Hover X1 app open to be able to see where the drone is going via the live camera view. Additionally, if you turn off your phone it disconnects from the drone so the remote won’t work.
What is needed is a mount for the remote and your phone. Thankfully innovative 3D print designer Izu Watanabe created one, and provides the 3D print file for his HOVERAir X1 Remote Control Grip free to download from here and here. You can watch his YouTube video here.
I don’t have a 3D printer, so I haven’t tried it. I may use an online printing service to make it for me.
More Ideas
What ideas have you found or come up with that can make the experience of flying the X1 even better with a controller? Please share down below!
Discover more from Chris Duke
Subscribe to get the latest posts sent to your email.
dude
Feb 21, 2024 (9:19 am)
hey, looks like for the key combos you can only trigger each key once per combo. selecting e, then f, then e again just removes the e from the key combo sadly. otherwise thanks a lot.
Chris Duke
Feb 21, 2024 (10:15 am)
Bummer! Thank you for testing it out. I’ll send them some feedback to allow support for this (and please do the same if you have time!)
Karl
Mar 14, 2024 (12:36 am)
Change L2 – M in L2 – K and the * – N works!
DAVID J Rogers
Apr 24, 2024 (11:04 am)
Excellent write up. Thank you. I was able to use this guide to program my buttons/keys the way I wanted and sync them, but I am having trouble getting the remote to work with the Hover app. When I tell it to connect to the remote, I get a message that says “an app is needed” even though I have the app. I am using a Samsung S22 Ultra phone.
Any ideas about the “needs an app” message?
Dave Rogers
dvcrogers@yahoo.com
Bert
May 17, 2024 (6:18 am)
Thank’s a lot for your detailed and clear explanations . My problem is : the configuration on the 8bitdo micro with the manual control of hoverair x1 works except the gimbal camera , letters K and M , even with the initial profile the 8bitdo. In fact the first time I press the k button there is a little move of the camera and that’s all , after that, stop and no other movement. The button with letter M doesn’t do anything . I tested with different configurations of buutons , even your configuration, and only the gimbal fonction doesn’t work . Have you meet this problem or somebody else? Thanks in adavance if you have some ideas . Bert.
Chris Duke
May 17, 2024 (7:58 am)
Hey Bert! Haven’t had any problems like that. I would suggest making sure the controller has the latest firmware and if you’re still having issues, try reaching out to Hoverair for support. If I think of anything else I’ll add here.
Joe Smith
Dec 4, 2024 (1:33 pm)
Chris …Where can we buy the 3D printed grip to hold the phone and controller.
JOE A SMITH
Dec 16, 2024 (9:52 am)
Are there other programable controllers that will work with the Hover x1
Thanks,
Joe Smith
josephasmith@comcast.net
Michael
Oct 6, 2025 (6:44 am)
Thanks for all the information! Great guide!!!!!!
Everything works really good!