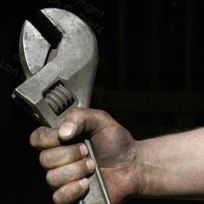
 So let me guess… you just finished that project and tossed all your tools back into the drawer, without giving them a thorough cleaning. As much time as you spend caring for your car or home, you need to take equally good care of the tools you use to work on them. Here are a few easy and recommended ways to keep your tools looking and working like new.
For basic non-powered tools, one of the best approaches is also the most straightforward: hot, soapy water. Simply by letting hand tools soak for some time, a surprising amount of build-up will be removed. When deciding water temperature, a general rule of thumb is to use warm water but not hot to the point of irritating your skin.
Note that whenever liquid is used for cleaning, do not let your tools air-dry. Once you’ve finished cleaning, towel dry thoroughly to eliminate the possibility of rust development.
In case that’s not enough, additional options include applying high-pressure water and steel wool. Beyond dirt and general debris, steel wool can also be highly effective at removing rust without damaging or wearing down tool surfaces you want to keep intact. Craftsman makes this pressure washer & steam cleaner combo that will certainly help with not just cleaning your tools, but a lot of other things around the shop and home.
When it comes to power tools, cleaning requires a different approach. For the majority of handheld power tools, there are blocks of graphite, also known as brushes, which conduct electricity for motor operation. These brushes are eventually worn down over the course of general use.
You’ll know it’s time for a new set of brushes when you see an increased amount of sparking within the motor housing. To install new brushes, first remove dust from the brush covers, located on opposite sides of the motor, and then unscrew the covers with a screwdriver. You’ll likely want to keep a finger on the covers while loosening, just in case they’re spring-loaded.
Remove the brushes and clear out any remaining dust. I recommend using a vacuum during this step, as it will pull dirt away, as opposed to compressed air, which may push debris into the tool’s drive components, many of which do not react well to contamination. Install the new brushes by simply reversing the removal process. You’ll likely be surprised by how much of a difference this basic swap will make.
I also highly recommend checking any bladed power tools and replacing any blades that appear to be getting dull. A dull blade means greater stress put on the engine and ultimately premature wear. It’s generally a good idea to install new blades on a semi-regular basis. The avoided long-term costs are well worth the preventative maintenance.
Other easy, worthwhile cleaning includes applying oil to power tools, making sure all of your tools are still stored in a dry environment and removing any shavings left from wood, metal, etc. Tool organizers such as tool chests or even a small tool box are recommended, depending on how many you have. Wooden tool boxes are great because they can help absorb moisture, but they are hard to come by these days so if you live in a humid climate, I would suggest buying some silica gel packets (they’re cheap!) and placing one in each drawer of your tool box. I get those gel packs all the time for free when buying electronics. Save them and re-use them, instead of tossing them out!
By taking the time to clean your tools, they will not only last longer, but will perform significantly better throughout their service life as well.

Discover more from Chris Duke
Subscribe to get the latest posts sent to your email.

Bonham Chrysler (@Bonham_Chrysler)
Apr 20, 2015 (12:07 pm)
Are you a guy (or woman!) who likes to organize and clean EVERYTHING including your tools? http://t.co/n4nS3yLMl9